This guide is for Auto-Provisioning Yealink and Grandstream devices that have been purchased via TelcoSwitch or NetXL. For third party handsets, please contact the support team and provide the MAC addresses so that we can ensure that the device can connect to our provisioning system.
1. Go to Config from the menu on the left of the Dashboard.
2. Then select Hardware from the drop-down.
3. You will land on the My Devices tab of the Hardware section
4. . Click the +Add Hardware button on the right-hand side

Enter the MAC Address for the device you wish to register to a user. The MAC address can be found with the barcode at the bottom of the device. It can also be found on the side of the original box that the handset arrived in and you can also power up the device and obtain the MAC from the phone’s Menu.
Note: On a Yealink phone go to Menu > Status to find the MAC address.
You can also add the Serial Number for the handset (which is optional).
Give the handset a Name and then select the handset type from the Hardware drop-down list.

Once you have entered the hardware details click the green Add Hardware button.

Note: When you add multiple devices to the Dashboard, you can toggle between having a Grid view or a List view of the handsets in the top right-hand corner.
Grid View

List View

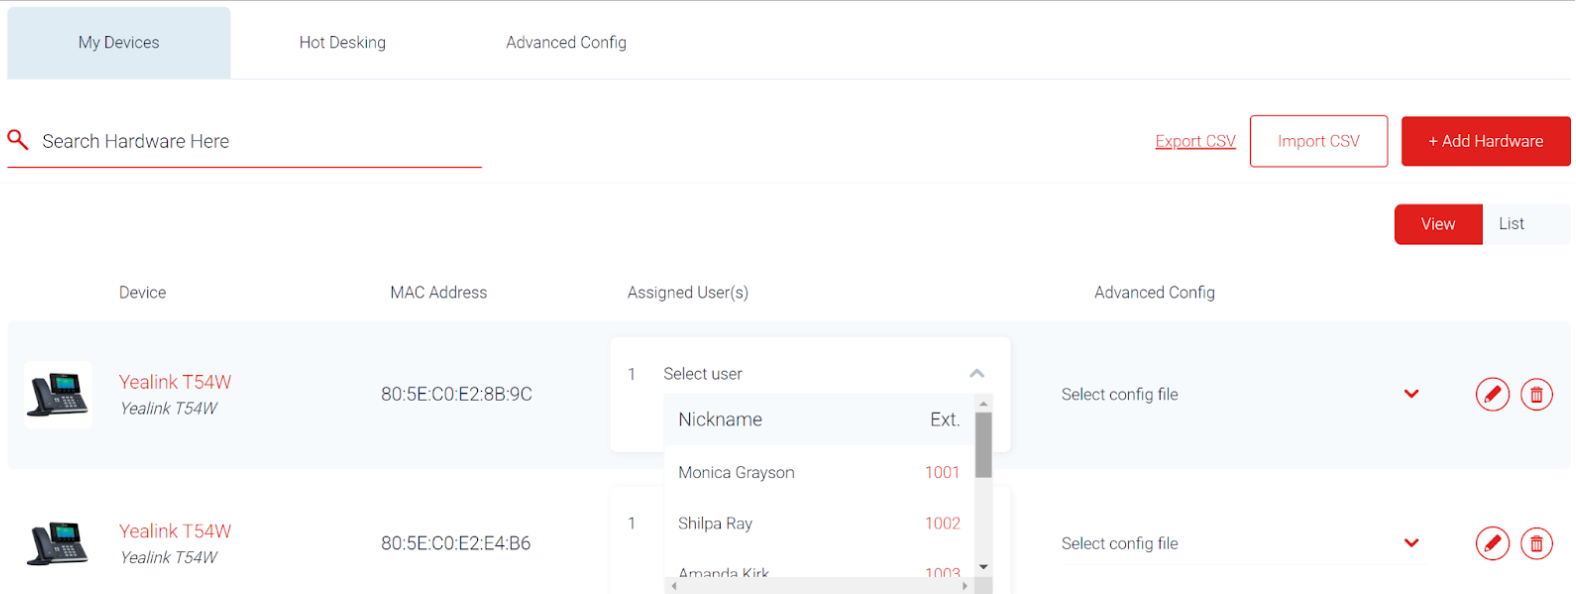
When in List view, you can select the User that you want to register the handset to with the Assigned User(s) drop-down box. You can map each of your MAC addresses to any of the users that you have on the system.

When you boot up the device, it will register against your chosen user and they will be able to make and receive calls. You can change the user at any time by selecting a different one from the drop-down. The update that you make in the Dashboard will automatically be pushed to the device.
1. If your handset supports multiple accounts, you can register these by selecting the Show More option

2. You can then choose the additional users from the extended drop-down list

